Manage Office 365 Licence Rules
Office 365 Licences
Why you may want to manage Office 365 Licences
Managing the Office 365 Licences applied to your users is useful if you want to:
- Apply paid Licences to a subset of users
- Restrict or grant access to Skype or Yammer for a subset of users
- Restrict or grant access to mail and calendar for a subset of users
- Enable Microsoft Classroom for users
Most sites will not need to manage Office 365 licences as the defaults will be adequate.
What are the default licence allocations?
In the default mode, Pupils are allocated an Office 365 Student Licence All other user types are allocated an Office 365 Faculty Licence. Users have access to Mail but not necessarily to Skype or Yammer.
Managing Your Office 365 Licences Rules
To access Office 365 Licences Management
Select the Preferences tool from the SIMS ID launch Pad.

If you only have access to one site, the following step is not necessary
Then choose the site you wish to manage from the list of sites presented. You can use the search tool and column ordering functions to assist your search

Now click on the ManageConnected Services drop down and then click on the Office 365 Licences buttonlink


Creating an Office 365 Licence Rules
You are taken to a page where the user will be able to create, edit, remove and apply the office 365 licences rules
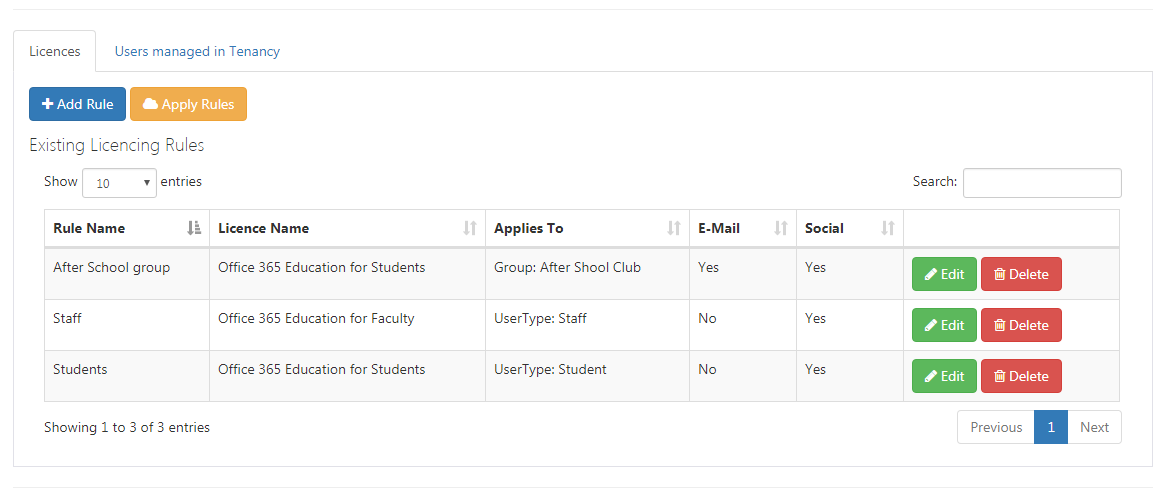

To add a new rule click on the Add Rule button

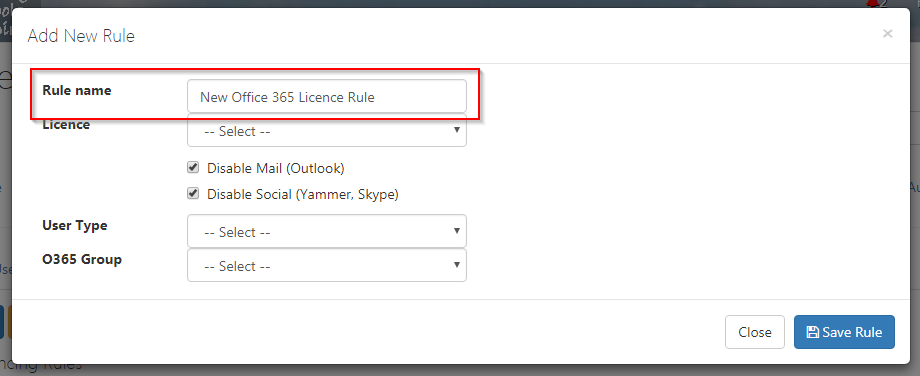
To create a new rule, type in a rule name,
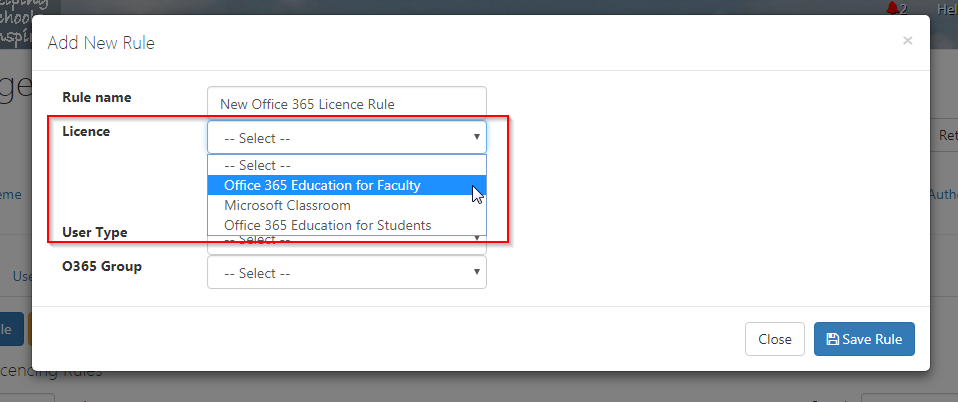
Select a Licence,
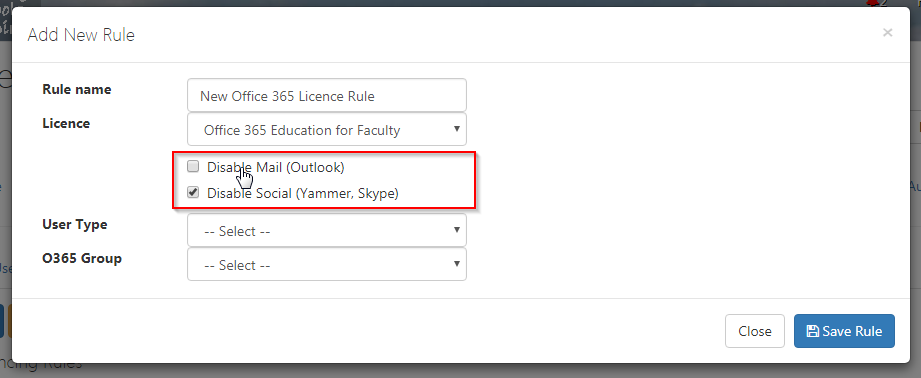
Choose which modules you wish to enable or disable,
Select a User Type or select an existing Office 365 Group,
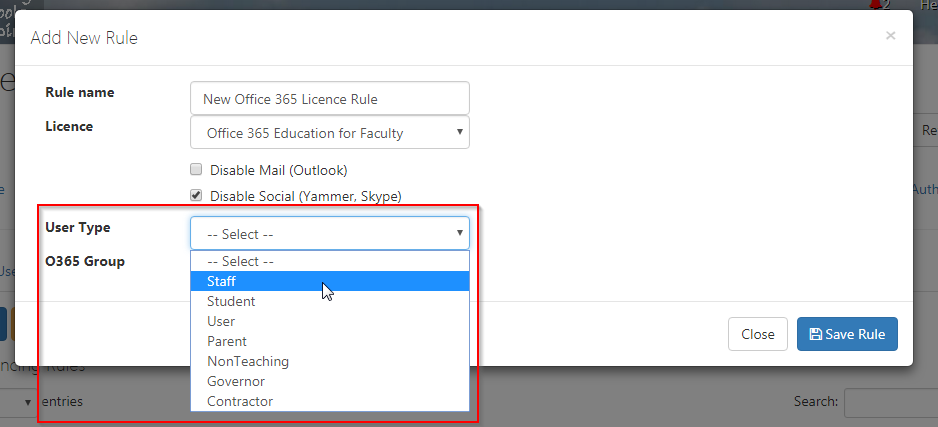
Finally, click on the Save Rule button

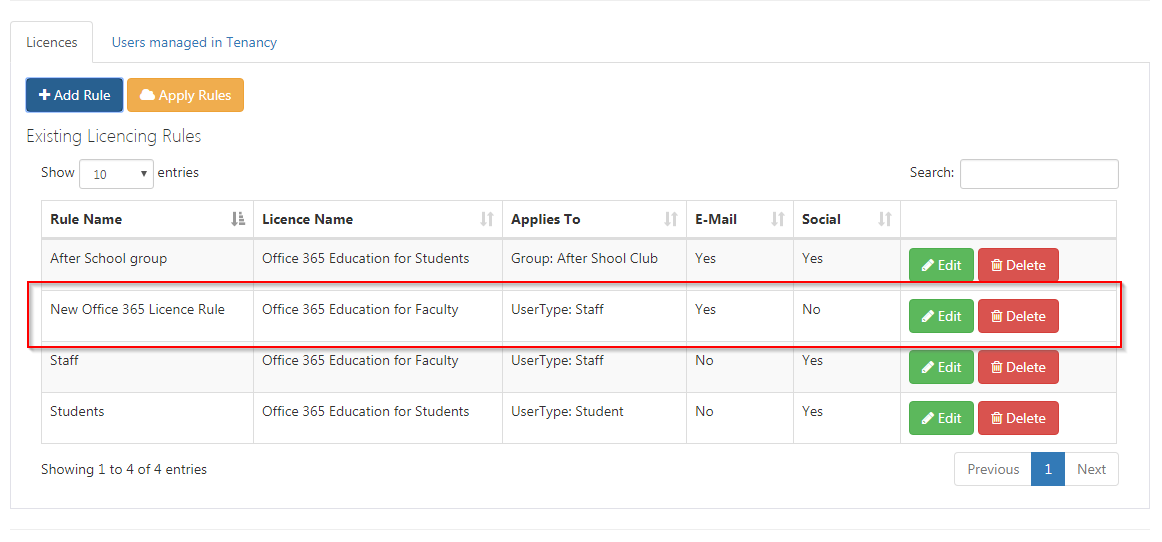
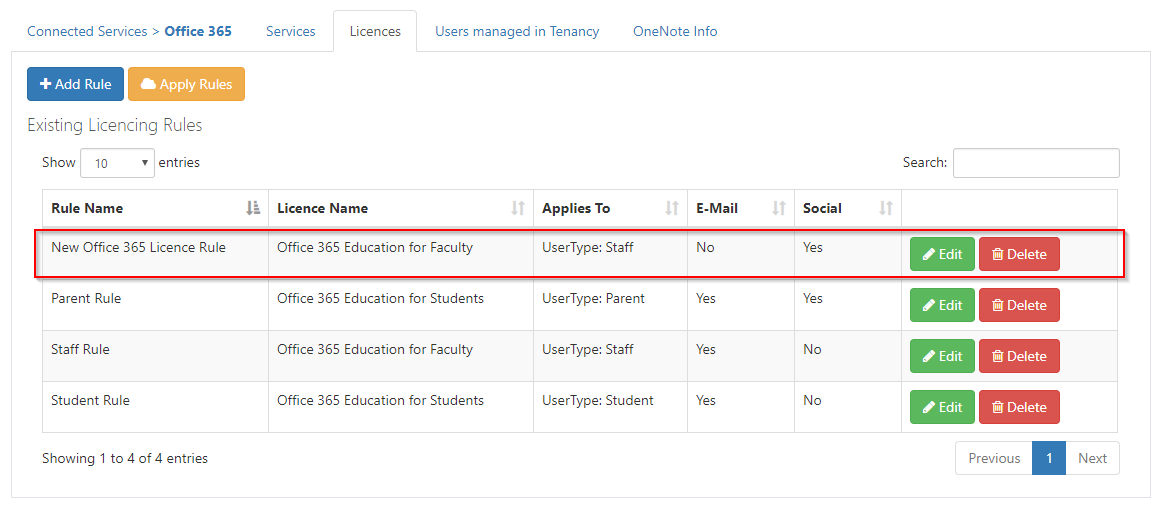
Once a rule has been created it will be shown in the rules table along with all of the relevant information of what the rule does
Editing Existing Office 365 Licence Rules
To assist you in finding an Office 365 rule you will have access to a search tool and column ordering functions


Once the rule has been found click on the Edit button with the rules table

Within this new screen, users can change the Rule Name, The licence applied, The modules that can either be disabled or enabled, The User Type or O365 group the rule is applied to
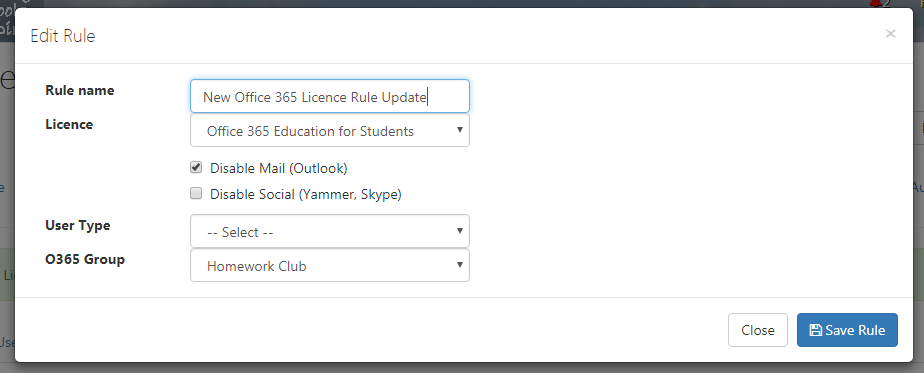
Finally, click on the Save Rule Button to apply any changes that have been made
Deleteing an Office 365 Licence Rule
To delete a rule, click on the Delete Button to the right of the rule

You will then need to click ok on the resulting dialogue box.

Excluding Users from Licence Rules
If you have any users which have more complex licencing requirements, then these users can be excluded from automatic licence management.
Any users listed here will need to have their licences managed in the Microsoft Office 365 Portal
To add or remove a user from the "Users Managed in Tenancy List" click the Edit Members button.
Will then be presented with the standard people picker. This will show you a list of users that are already in the list. Clicking on the Red X next to the user will remove them from this list.
To add further users click on the Add Members Button you can then search for the user and click the Green + next to the sure name.
Please ensure you click Save to complete the action
Applying an Office 365 Licence Rules
In order to apply any of the Office 365 Licence Rules the user will need to click on the Apply Rules button
When multiple rules apply to a user, group rules override the user type rule. Within the group rules the most restrictive setting for email and social is used.

Please be aware that once a rule has been applied it may take some time for the rule to be applied to ALL of the affected users at your site as Microsoft processes the licence rules.
Also be aware that if a rule is removed or is missing when rules are applied to the site this will affect those users and they will have any previous licences applied removed. To resolve this ensure that the licences are available and there is a rule for all user types and then click 